

Installer un serveur Web (LAMP)
| Serveur Apache | Module php | Serveur MariaDB | Transférer son site Web | HTTPS |
Installer le serveur Apache (Serveur Web)
Documentation : Apache HTTP Server Documentation
Installer
adminX@serveurWebX:~$ sudo apt update
adminX@serveurWebX:~$ sudo apt install apache2
Valider l'installation
Vérifier que le processus est démarré
adminX@serveurWebX:~$  ps -e | grep -E '(apache|PID)'
    PID TTY          TIME CMD
   1780 ?        00:00:00 apache2
   1782 ?        00:00:00 apache2
   1783 ?        00:00:00 apache2
Vérifier que le port utilisé par Apache (80 par défaut) est ouvert
Commande ss : another utility to investigate sockets
Options :
-l, --listening : Display only listening sockets.-n, --numeric : Do not try to resolve service names.-t, --tcp : Display TCP sockets.
adminX@serveurWebX:~$ ss -lnt sport = :80
State   Recv-Q  Send-Q   Local Address:Port     Peer Address:Port  Process
LISTEN  0       511                  *:80                  *:*
Le port 80 accepte les connexions IPv4 et IPv6.
Vérifier l'état du serveur
adminX@serveurWebX:~$ sudo systemctl status apache2
● apache2.service - The Apache HTTP Server
...
   Active: active (running) ...
...
................ raspberrypi systemd[1]: Starting The Apache HTTP Server...
................ raspberrypi apachectl[1319]: AH00558: apache2: Could not reliably determine the server's fully qualified domain name, using 127.0.1.1. Set the 'ServerName' directive globally to suppress this message
................ raspberrypi systemd[1]: Started The Apache HTTP Server.
La commande précédente indique que le serveur est démarré mais que son nom n'a pas pu être déterminé. On doit affecter la directive ServerName dans le fichier /etc/apache2/apache2.conf
après en avoir fait une sauvegarde.
Sauvegarder la configuration initiale
adminX@serveurWebX:~$ sudo cp /etc/apache2/apache2.conf /etc/apache2/apache2.conf.origin
Modifier /etc/apache2/apache2.conf
A l'aide de la commande ci-dessous ajoutez
la directive ServerName suivie du nom FQDN de votre serveur à
la fin du fichier /etc/apache2/apache2.conf. Exemple :
adminX@serveurWebX:~$ echo "ServerName serveurWebX.x.lan" | sudo tee -a /etc/apache2/apache2.conf
Visualisez le résultat :
adminX@serveurWebX:~$ tail -1 /etc/apache2/apache2.conf
ServerName serveurWebX.x.lan
Redémarrer Apache et vérifiez de l'état du serveur
adminX@serveurWebX:~$ sudo systemctl restart apache2
adminX@serveurWebX:~$ sudo systemctl status apache2
● apache2.service - The Apache HTTP Server
...
   Active: active (running) ...
...
................ raspberrypi systemd[1]: Starting The Apache HTTP Server...
................ raspberrypi systemd[1]: Started The Apache HTTP Server.
Tester
- Accédez à la page par défaut
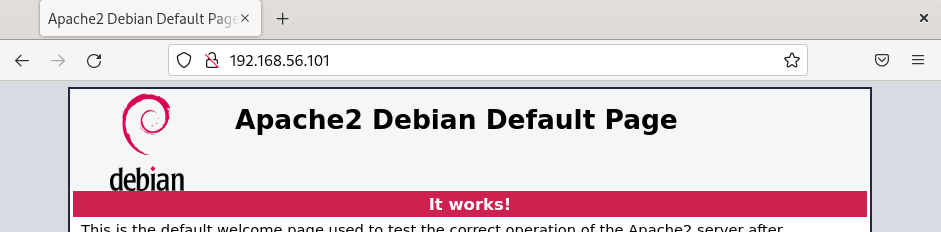
Dans un navigateur, saisissez l'adresse IP de votre RPI, la page par défaut ci-dessous doit apparaître :
Les pages du site Web se trouvent dans le répertoire /var/www/html.
- Sauvegardez la page par défaut
adminX@serveurWebX:~$ sudo mv /var/www/html/index.html /var/www/html/indexDefault.html
- Créez la page
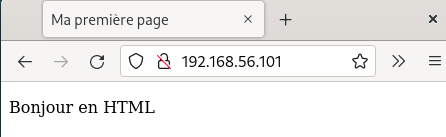
index.phpà l'aide de la commandesudo nano /var/www/html/index.html: /li>
<!DOCTYPE html>
<html>
<head>
<meta charset="UTF-8">
<title>Ma première page</title>
</head>
<body>
<p>Bonjour en HTML</p>
</body>
</html>
Installer le module PHP
Installer
J'installe le module php-mysql car il est utile si on souhaite communiquer avec une base MySQL ce qui est la plupart du temps le cas.
adminX@serveurWebX:~$ sudo apt install php libapache2-mod-php php-mysql
Recharger la configuration
adminX@serveurWebX:~$ sudo service apache2 restart
Valider l'installation
Tester
Supprimez la page html précédemment créée
adminX@serveurWebX:~$ sudo rm /var/www/html/index.html
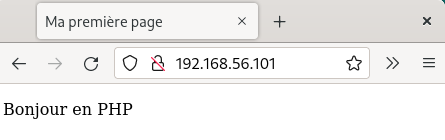
Créez la page index.php à l'aide de la commande sudo nano /var/www/html/index.php :
<!DOCTYPE html>
<html>
<head>
<meta charset="UTF-8">
<title>Ma première page</title>
</head>
<body>
<?php
echo "<p>Bonjour en PHP</p>\n";
?>
</body>
Pour que la page se charge automatiquement en entrant l'URL du site, il faut supprimer la page
index.html.
adminX@serveurWebX:~$ sudo rm /var/www/html/index.html
Résultat :
Transférer son site Web
Créer un groupe pour les administrateurs du site
Créer le groupe webMasterGroup
adminX@serveurWebX:~$ sudo groupadd webMasterGroup
Vérifier en consultant le fichier des groupes : /etc/group
adminX@serveurWebX:~$ cat /etc/group | grep webMasterGroup
webMasterGroup:x:1011:
Créer un utilisateur webMasterX membre du groupe webMasterGroup et lui attribuer un mot de passe
Créer l'utilisateur
J'attribue à l'utilisateur le répertoire de travail /var/www/html qui est la racine des sites Web utilisé par Apache.
adminX@serveurWebX:~$ sudo useradd webMasterX -g webMasterGroup -d /var/www/html
Verifier la création de l'utilisateur
adminX@serveurWebX:~$ id webMasterX
uid=1007(webMasterX) gid=1011(webMasterGroup) groupes=1011(webMasterGroup)
adminX@serveurWebX:~$ cat /etc/passwd | grep webMasterX
webMasterX:x:1007:1011::/var/www/html:/bin/sh
Attribuer un mot de passe à l'utilisateur webMasterX
adminX@serveurWebX:~$ sudo passwd webMasterX
Changer les droits sur le répertoire /var/www/html
Droits avant modification
adminX@serveurWebX:~$ ls -l /var/www/
total 4
drwxr-xr-x 2 root root 4096 oct.  24 20:56 html
Attribuer le répertoire /var/www/html(et les sous répertoires) au groupe webMaster
adminX@serveurWebX:~$ sudo chgrp -R webMasterGroup /var/www/html
Donner le droit d'écriture aux membres du groupe webMasterGroup
adminX@serveurWebX:~$ sudo chmod g+w /var/www/html
Vérifier l'attribution des droits
adminX@serveurWebX:~$  ls -l /var/www/ | grep html
drwxrwxr-x 2 root webMasterGroup 4096 17 oct.  09:29 html
Modifier le comportement de connexion ssh pour l’utilisateur webMasterX
Sauvegardez le fichier de configuration du serveur ssh
adminX@serveurWebX:~$ sudo cp /etc/ssh/sshd_config /etc/ssh/sshd_config.origin
Créez un fichier de configuration sans commentaires et sans lignes vides
adminX@serveurWebX:~$ sudo  grep -E -v '^(#|$)' /etc/ssh/sshd_config.origin > sshd_config
adminX@serveurWebX:~$ sudo cp sshd_config  /etc/ssh/sshd_config
Modifier le comportement de connexion ssh pour l’utilisateur webMasterX
adminX@serveurWebX:~$ sudo nano /etc/ssh/sshd_config
adminX@serveurWebX:~$ sudo cat /etc/ssh/sshd_config
Include /etc/ssh/sshd_config.d/*.conf
KbdInteractiveAuthentication no
UsePAM yes
X11Forwarding yes
PrintMotd no
AcceptEnv LANG LC_*
#Subsystem      sftp    /usr/lib/openssh/sftp-server
Subsystem sftp internal-sftp


Match User webMasterX
        X11Forwarding no
        AllowTcpForwarding no
        ChrootDirectory /var/www
        ForceCommand internal-sftp
Redémarrez le serveur ssh
adminX@serveurWebX:~$ sudo systemctl restart sshd
A présent l’utilisateur webMasterX :
- Peut de connecter avec WinSCP mais il ne pourra pas remonter l’arborescence du système de fichier.
- Ne peut pas se connecter avec une session ssh
Tester en transférant son site Web
- Transférer les fichiers de votre site Web comme indiqué dans l'article : Raspberry Pi : Transférer des fichiers puis, éventuellement :
Résultat :
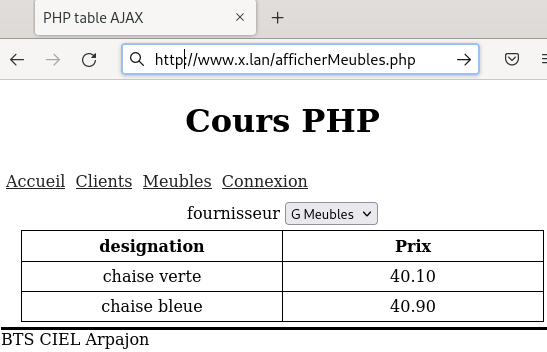
Exemple de site Web en PHP en lien avec une base de données :
Passer le site en HTTPS
Nécessite de se connecter : article réservé aux étudiants du BTS CIEL du Lycée Edmond Michelet à Arpajon